
What are the differences between ESTA, VISA & I-94
What is the difference between ESTA, visa, and I-94? Many people think that a visa and ESTA are the same thing, but they're completely different. Both are procedures that allow foreign people to enter the United States, but they aren't interchangeable, and you must apply for one or the other in different situations. In addition, depending on the route of entry into the United States, even if you have an ESTA or a visa, you're required to apply for an I-94 as well.
Here we explain the main differences between the three and when it's necessary to apply for each one:
When should I apply for ESTA?
ESTA (Electronic System for Travel Authorization) is a system within the Visa Waiver Program that determines a person's eligibility to enter the United States for tourism or business purposes.
💡Recommended: How to apply for ESTA to travel to USA |Step-by-step guide|
These are the cases for which ESTA applies:
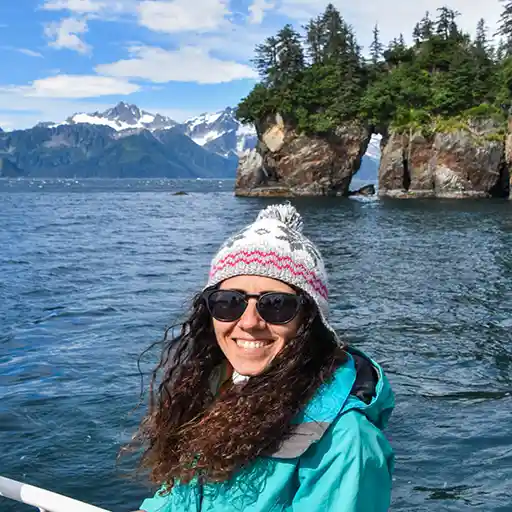
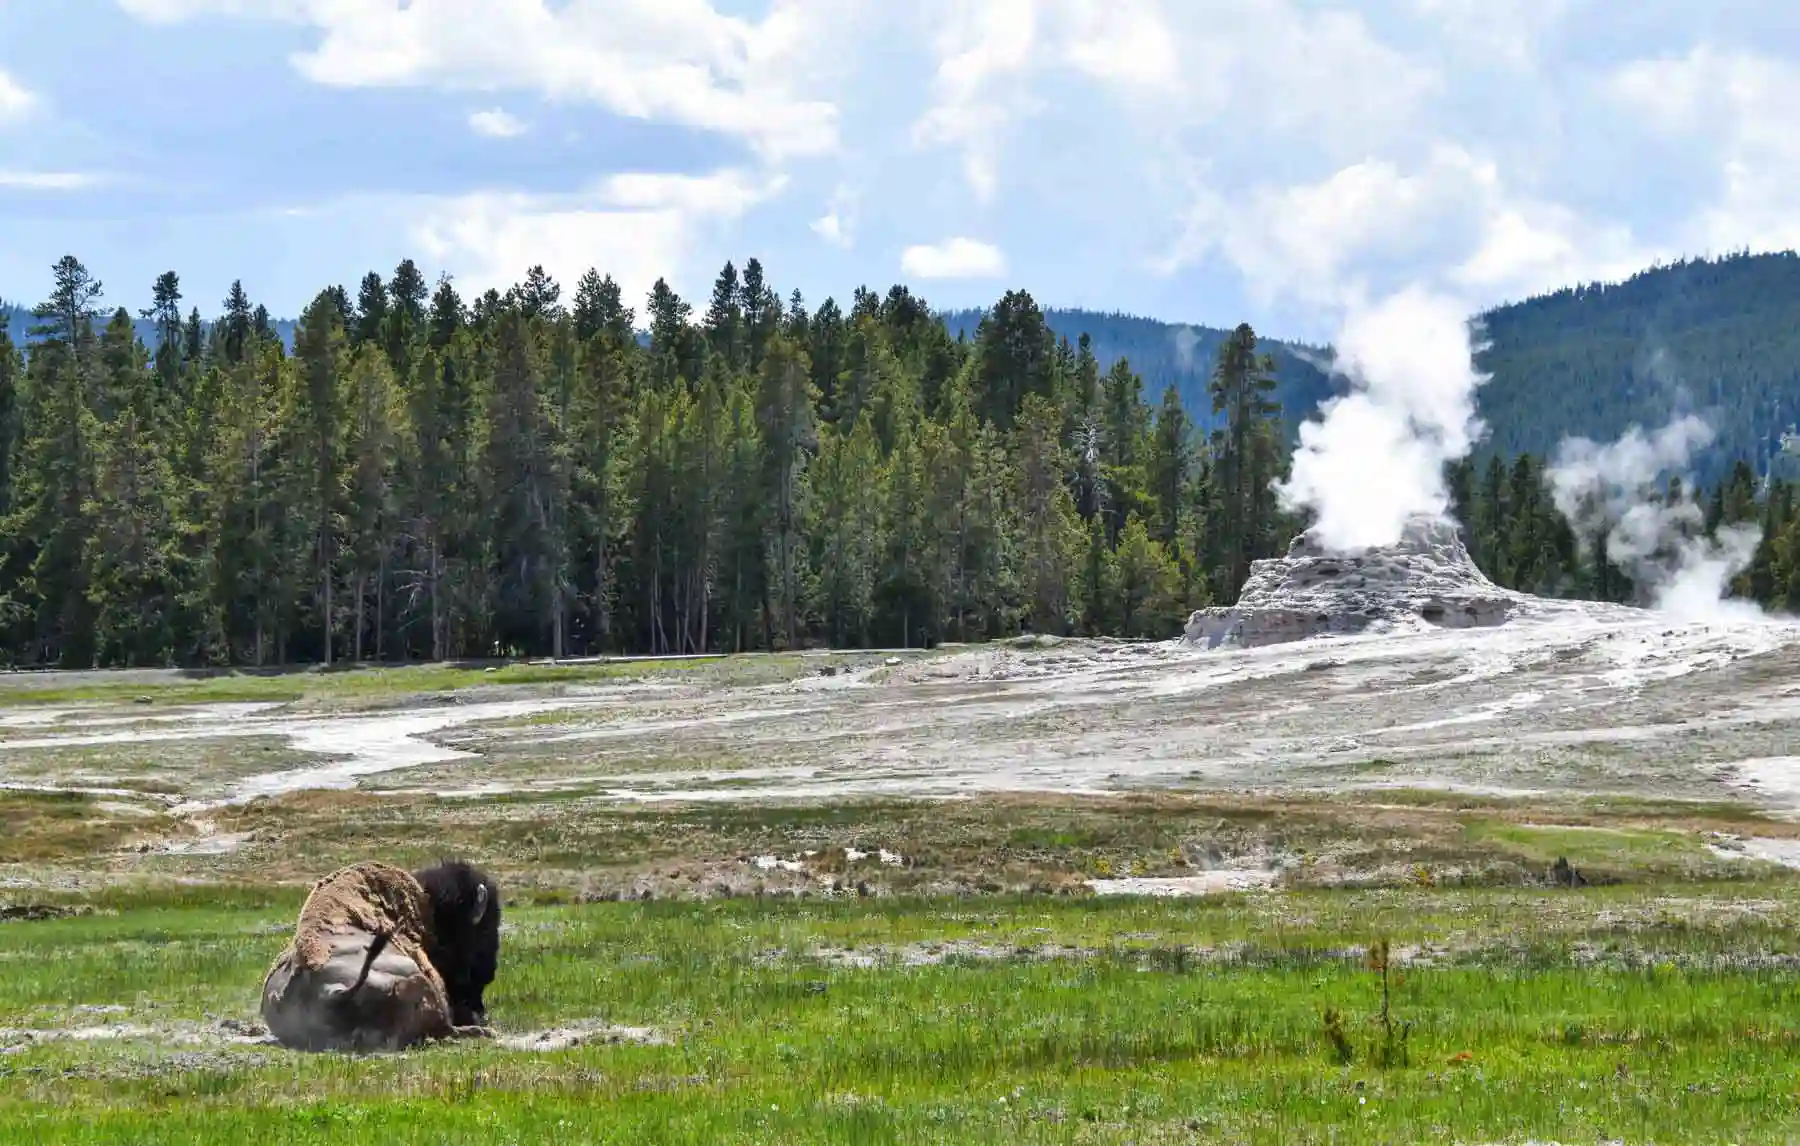
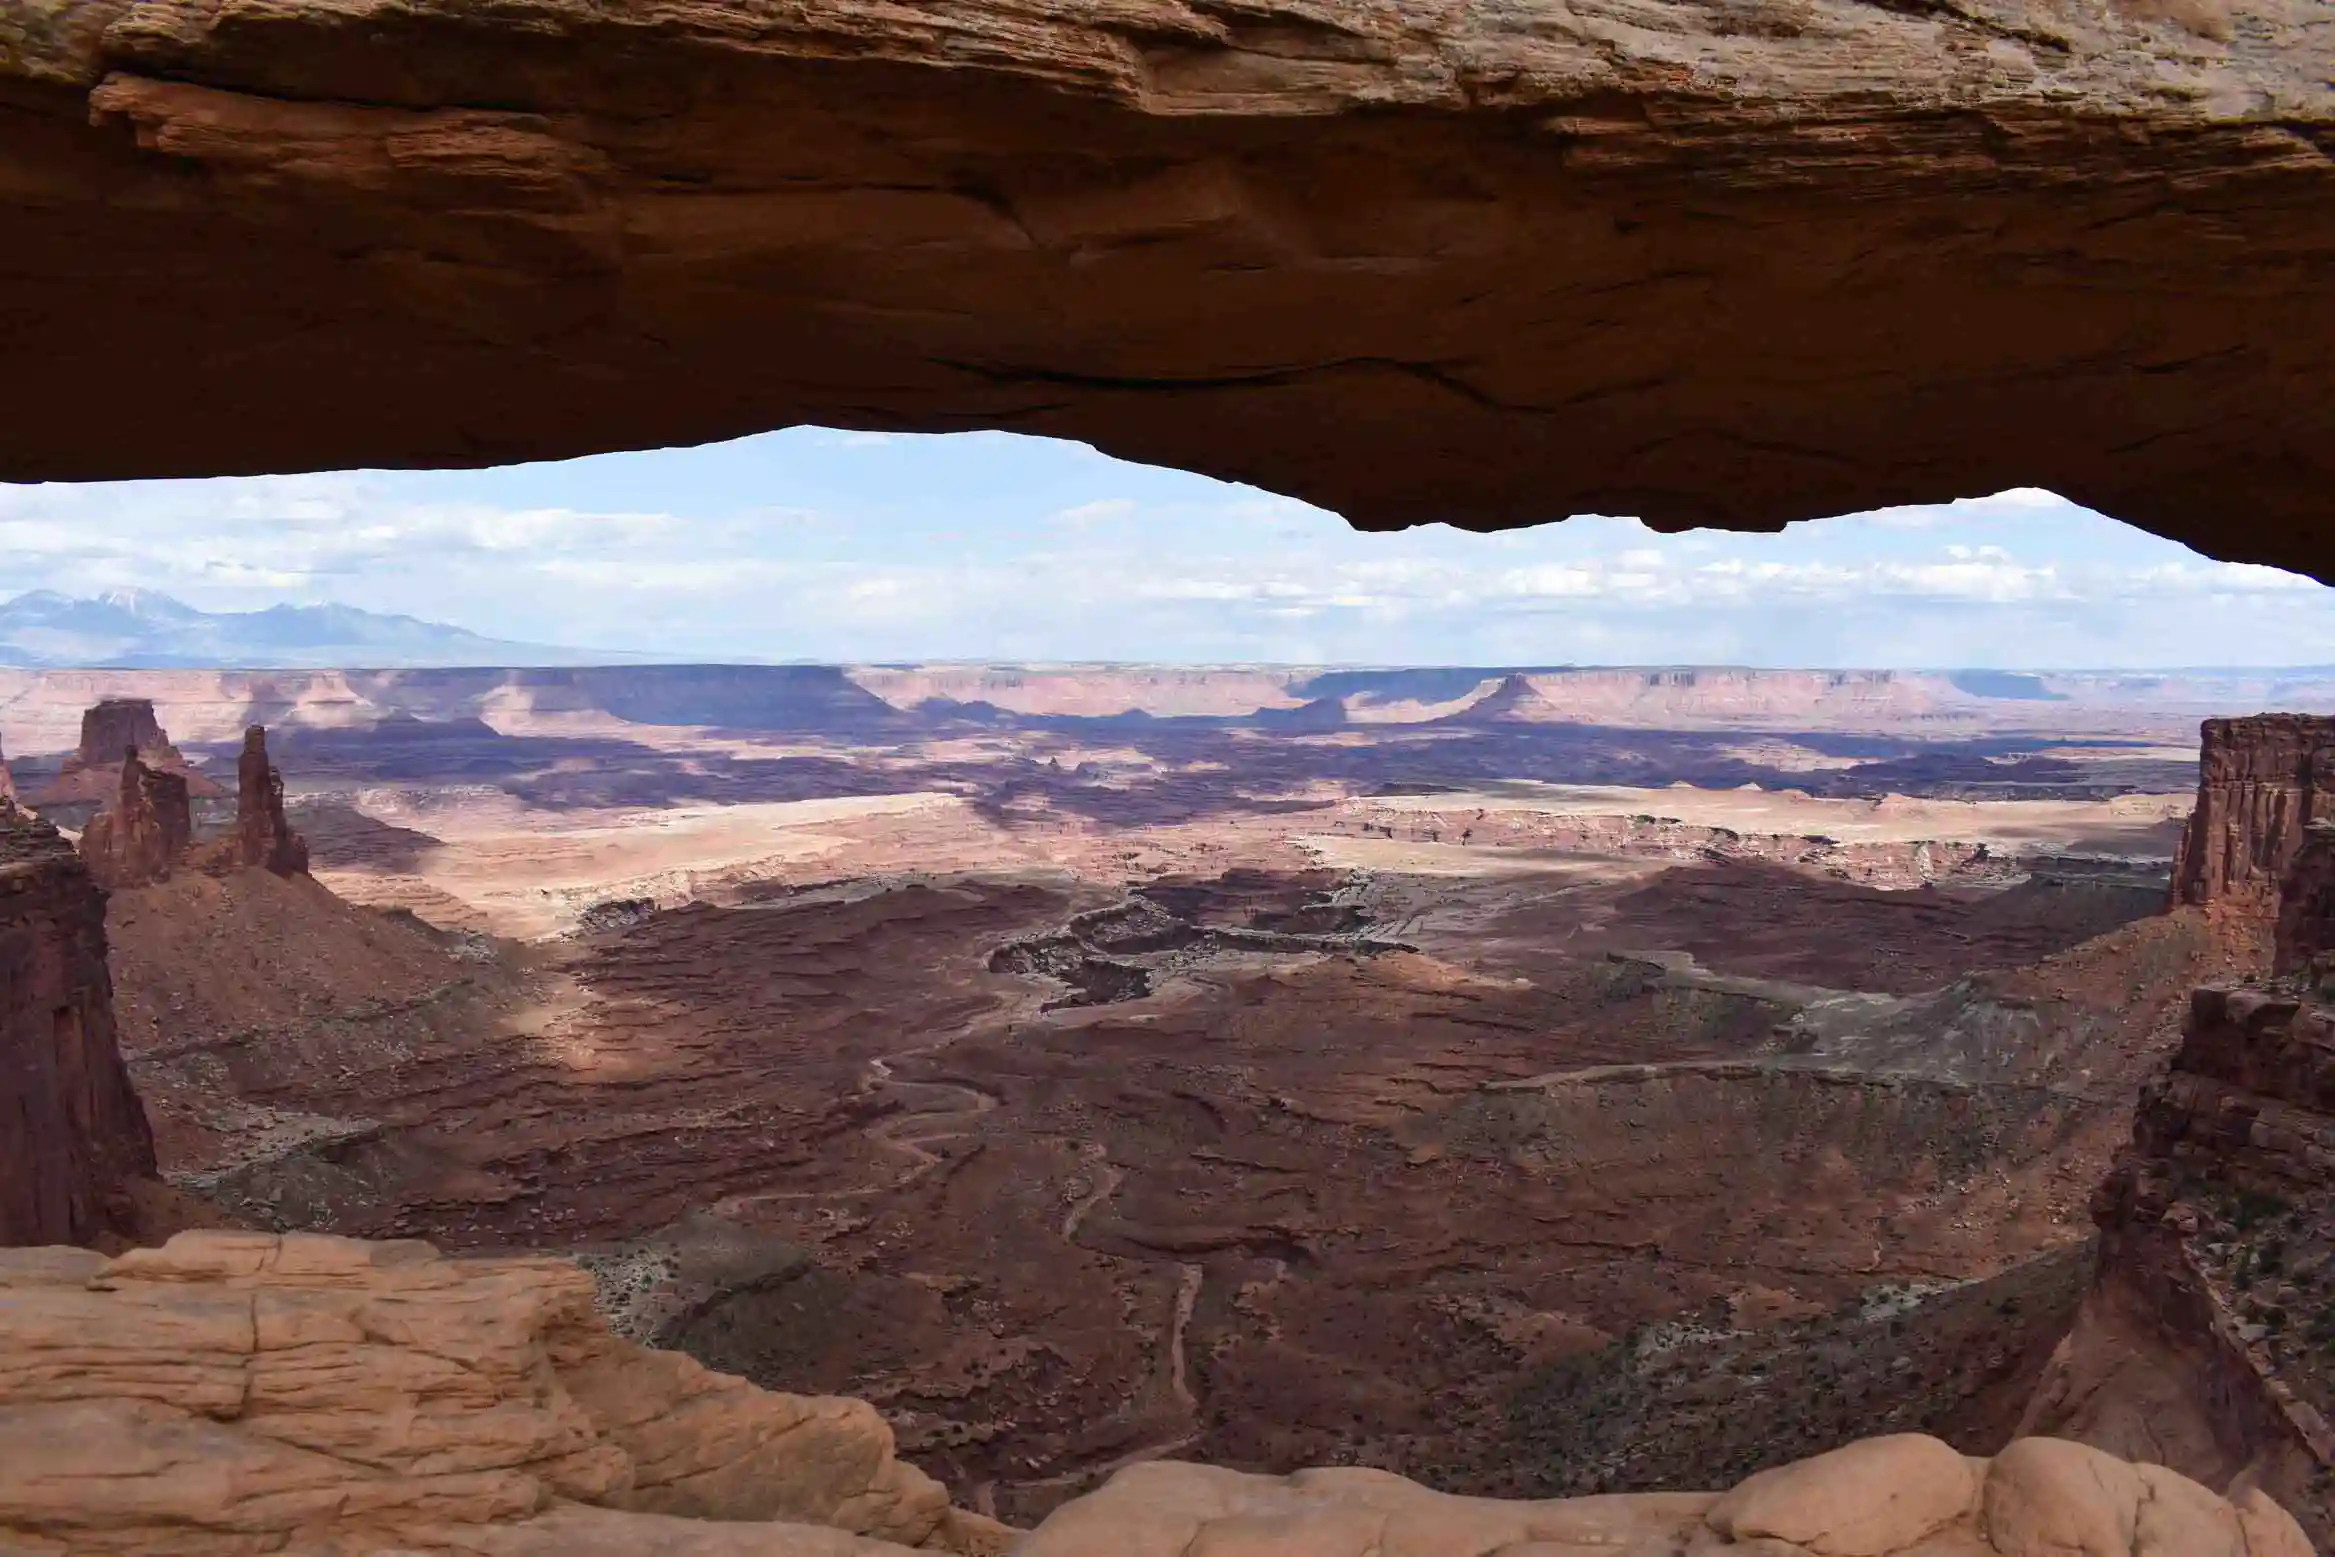
- If you want to stay in the United States for up to 90 days for tourism or business. This could be, for example, a visit to New York, a getaway to San Francisco, or a 15-day road trip to the West Coast of the USA.
- If you're transiting through any airport in the United States, even if you aren't leaving the airport or passing through immigration control. If you have a flight with a stopover in the United States, you'll need to apply for ESTA regardless of the length of the stopover.
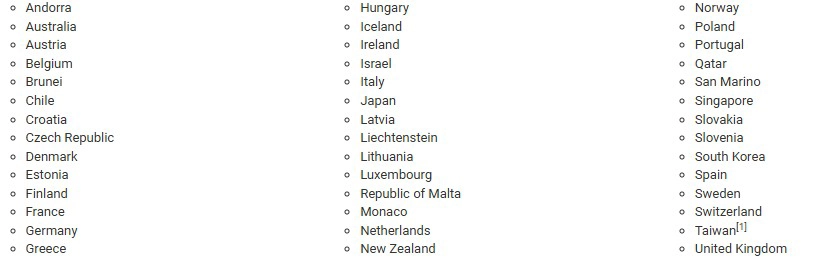
- If your passport is issued by any of these countries:
When should I apply for a visa for the United States?
There're different types of non-immigrant visas for the United States. You can find them all here. In this post we'll focus on the B-2 tourism visa, which applies to tourism, family/friends visits, or medical treatment. The B-1 visa has the same process, but it's only for business purposes.
These are the requirements for applying for a tourist visa for the USA:
- If you want to visit the United States for more than 90 days.
- If you're traveling to the United States for a purpose other than tourism or short-term business.
- If you're transiting in the United States and aren't eligible for ESTA.
- If you've traveled to Iran, Iraq, North Korea, Sudan, Syria, Libya, Somalia, or Yemen since March 1, 2011, or if you have dual citizenship in any of these countries (except for military personnel and government officials who have traveled to these countries on official business).
- If you've traveled to Cuba on or after January 12, 2021.
💡Remember that...

-An approved visa doesn't guarantee that you'll be admitted to the United States; you still run the risk of being denied entry once you arrive in the country.
-You need a ticket out of the United States in order to enter the country.
-If you have children, they must have their own valid passport and must also apply for a visa, regardless of their age.
When should I request the I-94?
The I-94 is a form that controls the entry and exit of foreigners in the United States. Previously, it had to be processed together with the ESTA or visa regardless of the route of entry into the country, but now it's only mandatory if you enter the United States by land or ferry. For example, if you're in a road trip through Canada and the United States and you're entering through one of their land border crossings, you'll need the I-94 (in addition to your ESTA or visa).
The I-94 is also processed per person, and although you can do it directly at the border, it's advisable to apply online in advance through the official I-94 website. If you do it online, keep in mind that the application is valid for 7 days. For example: if you apply for the I-94 on March 10, you'll have until March 17 to enter the USA. If you exceed this date, you'll have to make a new application (and pay again).
The cost of the I-94 is $30 as of September 30, 2025 (previously $6). If you apply for it at the border, you can pay by card there and then.
How long is the USA visa valid for
The B-2 visa allows you to stay in the United States for periods of up to 180 days. This visa is multi-entry and valid for 10 years, which means that during this time you don't need to renew it or reapply for it.

INTERNET IN THE UNITED STATES
We have 2 discounts for you:
-3 FREE days with eSIMFlag ➡️ Unlimited data at the best price! Code: TRIPTOUSA10
-10% OFF with SimLocal ➡️ Best deal with limited data! Discount applied automatically
🤓 Take a loot at: Best SIMs & eSIMs for traveling to the USA
How much does a travel visa to USA cost
The visa to travel to the USA as a tourist costs $185 per person. Please note that this money is non-refundable if your visa application is denied.

How long does it take to get a Visa for the USA
The processing time for a U.S. visa isn't specified anywhere, as it varies depending on a number of factors. You may even be asked to provide additional information if there're any doubts about your profile.
What you should know is that part of the process involves attending an in-person interview at the US Embassy in your country, and there's usually quite a long waiting list for this. Once you've attended the interview, it usually takes between 3 and 5 days for your application to be approved.
We'll talk about this step later, but you can check the current waiting times at each country's embassy at this link. There you'll find the average waiting time and the time remaining until the next available appointment.
‼️Applying for a visa isn't like applying for ESTA; you need to plan well in advance because there's usually a waiting list for interviews.
United States travel visa application: Step by Step Guide
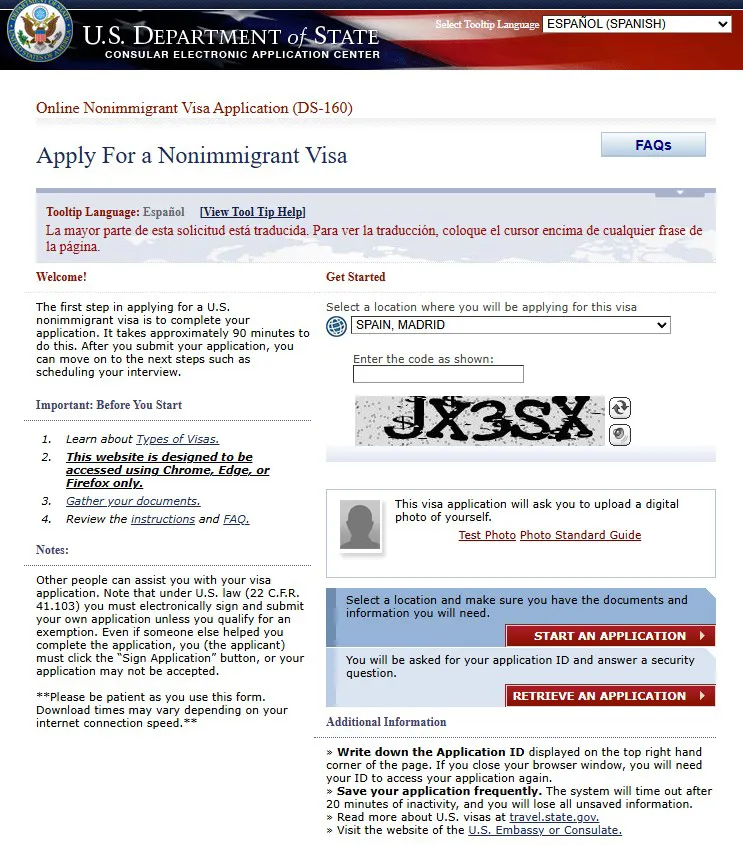
1. Complete the DS-160 form
The first step you need to take is to fill out the DS-160 form, which you can do by visiting this official website. We should warn you in advance that the system is not exactly modern 😂 The form consists of a total of 11 sections and takes longer than you might think. We'll try to summarize them for you and guide you on what to answer in some cases!
The first thing you need to do is translate the page into your language (if available). You'll find the menu in the upper right corner. As you'll see, the page isn't translated as such, but rather you have to hover your mouse over the phrase and it'll appear translated in a box.
-Choose the location where you want to apply for the visa (your country), fill in a captcha code, and click on "Start an Application." You'll be redirected to a new page, where you'll have to accept some conditions and choose one of the security questions that appear in the drop-down menu.
-Next, it's time to fill in some personal details such as your first and last names, gender, marital status, date and place of birth, National Identification Number, etc. Some fields only apply to the United States (such as social security number). In these cases, check the "Does not apply" box.
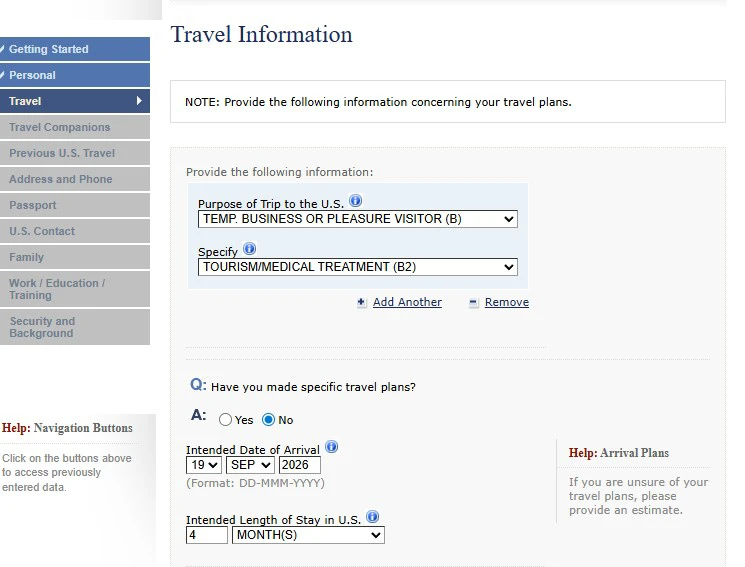
-In the next step, you must choose the purpose of your trip to the United States. As this post is focused on tourist visas, select the option "Temp. Business or pleasure visitor (B)" and in the second drop-down menu, select "Tourism/Medical Treatment (B2)."
-Next, you'll have to answer whether you've already planned your trip or not. If you answer "yes," you'll have to fill in your arrival and departure dates, flight number, etc. If your answer is "no," you'll have to enter an approximate arrival date and the estimated length of time you want to stay in the country. You'll also need to add an address where you'll be staying in the USA. This can be a hotel address. In the "Person/Entity paying for your trip" section, select "Self".
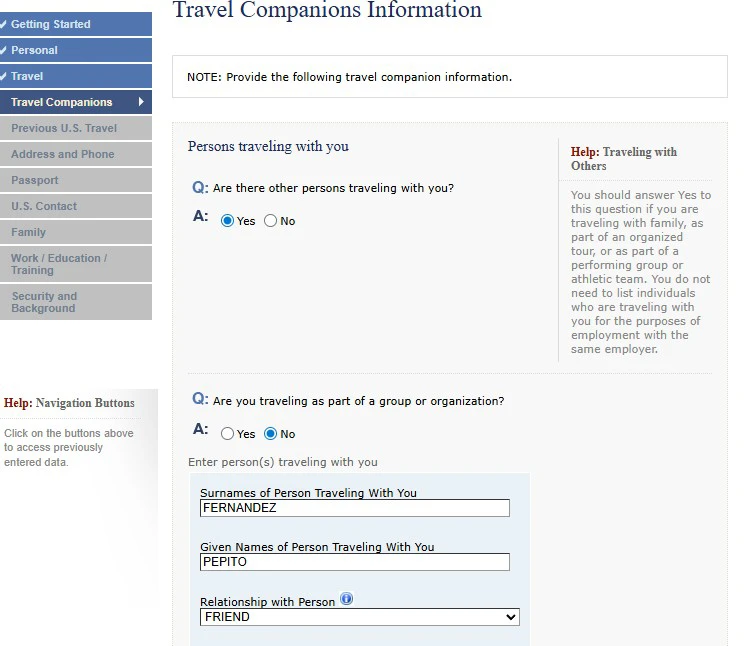
-Next, you'll come to the section of travel companions. Select "yes" if you're traveling with other people or "no" if you're traveling alone. If you select "yes," you'll need to fill in the names of the people and your relationship to them (child, parent, spouse, friend, etc.).
-In the next step, you must answer questions about your previous trips to the United States: Have you been to the US before? Have you previously applied for a US visa? Have you ever been denied a visa for the USA? Have you ever been denied ESTA? Has anyone filed an immigration petition on your behalf? Answer with complete honesty.
-You'll be asked for your address, phone number, email address, and social media profile. In the latter case, you can select "None" from the drop-down menu if you don't want to add any, but we recommend being honest and adding those you deem appropriate, as the official reviewing your application may search for them using your name.
-The next point is about your passport information: type, number, city, and country, date of issue, expiration date, and whether or not it has ever been stolen.
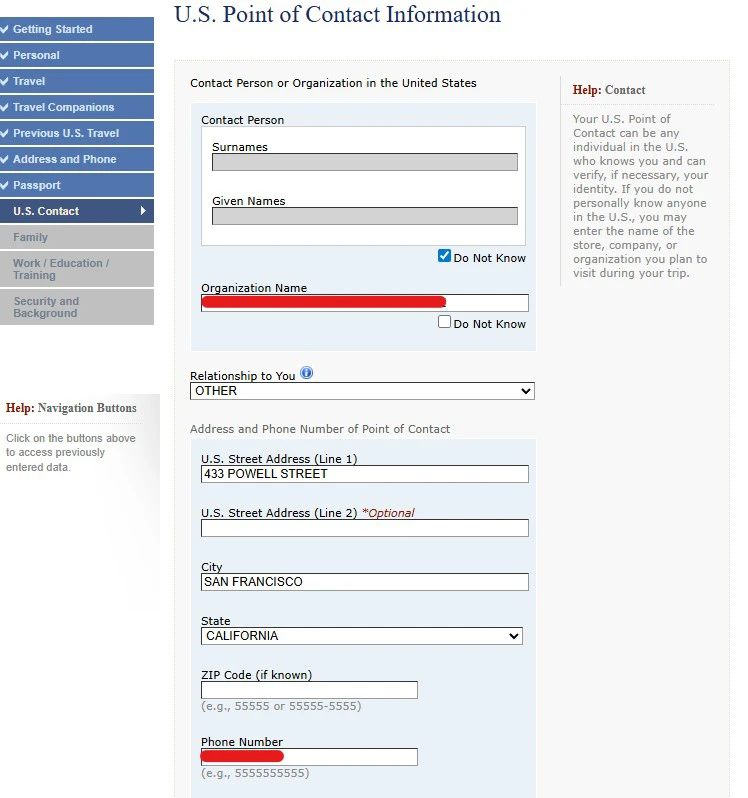
-Next comes one of the sections that causes the most confusion: the point of contact in the United States. If you know any person in the US, you can add his/her personal details. Otherwise, it's best to choose "Organization name" and enter the name of a hotel (preferably the same one you entered in the travel plan section). You can find the address and telephone number on the internet.
-Come on, you're almost done! It's time to enter your family information, such as your father's and mother's names and dates of birth, as well as whether either of them are in the US. You'll also need to say whether you have any relatives (excluding parents) in the United States. Then, answer the same questions about your spouse, if you have one.
-The questions in the following section are related to your work and education. You must enter the requested information about the company you currently work for: name, address, start date, monthly salary in your local currency, and a brief summary in English of your responsibilities.
They also ask you for information about past jobs, what languages you speak, and questions such as: Have you belonged to any clan or tribe? Have you traveled to other countries in the last 5 years? Have you worked for any charitable organization? Do you have knowledge of weapons, explosives, nuclear energy...? Have you served in the military? Have you served in any paramilitary groups, guerrilla groups, rebel groups...?
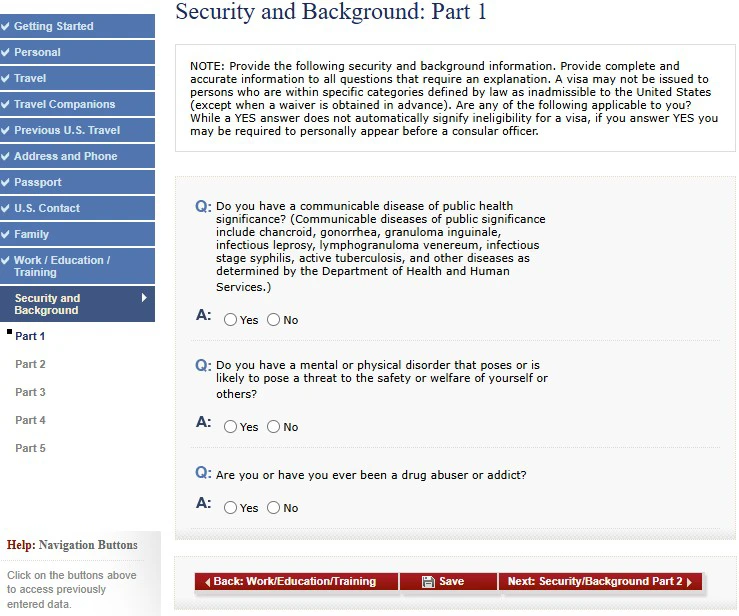
-Finally, you'll need to answer questions related to security. There're five pages full of questions such as: Do you have any infectious disease? Do you have any mental disorder? Do you have or have you ever had a drug addiction? Have you ever been arrested? Have you ever participated in money laundering? etc. As you can imagine, the ideal answer to these questions is "no." 😅
Now all you have to do is upload a photo of your face, like the one you take for your ID card. We recommend that you check the official photo requirements to find out what it should look like: color, full face, no glasses, neutral expression, etc. You must have the file on your computer as you have to upload it.
If the photo you upload is deemed incorrect by the system, you must upload another one or bring a correct 5cm x 5cm photo with you on the day of the interview.
Finally, you must review all the information and sign the application, entering your passport number and a captcha code. You must print the part of the form that contains a barcode with a number beginning with AA (it isn't necessary to print the entire form) and bring this document with you on the day of the interview.
2. Pay the taxes
Once you have completed the DS-160, it's time to pay the taxes, in this case $185. You must do it through the website of the U.S. Embassy in your country. Previously, this could be done at other embassies, but since September 2025, this is no longer possible.
You can find the complete list of embassies here, go to the one that is at your country and begin the process. You should select the option "I have completed the DS-160 form and need to apply for a visa." The next steps will be:
- Add the applicant's information: first name, last name, passport number, visa type, etc. Here you must also enter the confirmation number from the DS-160 form (the barcode number we mentioned earlier). ⚠️It's very important to enter this number correctly.
- Provide an address or select a post office to receive documents from the Consular Section.
- Pay the USA travel visa application fees.
3. Schedule an appointment at the U.S. Embassy for the interview
Did you know that you don't always need to go to the Embassy for the interview? If you meet certain requirements, you can take advantage of the Interview Waiver Program, which allows you to submit your visa application by postal mail instead of going in person.
Once you've paid the fee, the appointment system will ask you some questions, and depending on your answers, it'll tell you if you can participate in the program.
- If you're eligible: you'll need to send several documents to the Embassy in an envelope as your original valid passport, your previous visa, the DS-160 confirmation page, and a 5cm x 5cm (2 in x 2 in) photo. It'll take approximately three weeks to receive a response.
⚠️Keep in mind that if something is incorrect or they have doubts about your profile, they may still call you to attend the interview in person. Otherwise, they'll mail your original passport along with the approved visa. - If not: the program itself will redirect you to the appointment system so you can choose a day and time to go to the Embassy for the interview.
4. Attend the interview
The interview day has arrived! If you've been assigned to an in-person interview at the Embassy, you'll need to prepare yourself well. We know it can be nerve-wracking, just like a job interview. While we don't have personal experience with this, we do know of similar situations and can give you some advice.
Ideally, you should be able to answer the following questions simply and clearly. Also, bring any necessary documentation to support your answers (in addition to a printed copy of your DS-160 form).
- Reason for your trip to the United States: it must be clear that the reason is for tourism and that, for example, you aren't going to look for work or study.
- Financial situation: you have to prove that you have enough money to cover your trip. There is no set magic number, but it must be consistent with the type of trip you're going to take. For example, a 15-day trip isn't the same as spending 5 months in the country paying for hotels, flights, activities, etc. Bring copies of your bank accounts.
- Reasons why you will return: the interviewer is interested in ensuring that you don't want to stay in the United States, so you must explain your reasons for returning to your country of residence. Talk about your job (you can bring your employment contract), your family obligations, and the fact that you have a place to live (you can bring your rental agreement). In short, demonstrate the obligations that will make you return to your country and not stay to live in the USA.
After the interview, you must follow the instructions received at the Consular Section. You can also access your profile to check the status of your application and information about document delivery.
What else do you need to travel to the USA
Apart from your visa, you'll need other things to organize your trip to the United States. In addition to reading all our guides to ensure you have the best experience possible, remember these steps:
1. Take it out a travel insurance. You wouldn't dream of going to the United States without travel insurance, would you? Even if you think nothing will happen to you, trust us, it does. We've never used it in the US, but we have in Canada (where healthcare costs are just as high). Take a look at our comparison of travel insurance policies for the United States and decide which one suits you best.
2. Book your accommodation. The earlier you do this, the better. Hotels in the USA are expensive, so the sooner you book, the more money you will save and the more availability you will find. Use this search engine to compare and book, and read our specific articles on accommodation:
- Where to stay in San Francisco
- Where to stay in New York
- Where to stay in Las Vegas
- Where to stay in Seattle
3. Get a card with no fees. In the USA, you'll pay for practically everything by card, so to avoid currency exchange fees from regular banks, take a look to our post about the best travel cards for the USA. We recommend the Wise card, with it you can also withdraw dollars from ATMs free of charge (up to €200 per month).
4. Purchase an eSIM to have internet in the United States. If you want to have internet as soon as you set foot in the USA, we recommend purchasing an eSIM in advance. Don't miss our post about the best SIMs and eSIMs to travel to the USA! We use eSIMFlag because you get unlimited data at a great price, and we'll give you a 10% discount with the code TRIPTOUSA10!

We hope we've helped you with your USA travel visa application 😊 Do you have any questions? Leave them in the comments!